


In image processing, computer graphics, and photography, high dynamic range imaging (HDRI or just HDR) is a set of techniques that allows a greater dynamic range of luminances between light and dark areas of a scene than normal digital imaging techniques. The intention of HDRI is to accurately represent the wide range of intensity levels found in real scenes ranging from direct sunlight to shadows.
High dynamic range imaging was originally developed in the 1930s and 1940s by Charles Wyckoff. Wyckoff's detailed pictures of nuclear explosions appeared on the cover of Life magazine in the mid 1940s. The process of tone mapping together with bracketed exposures of normal digital images, giving the end result a high, often exaggerated dynamic range, was first reported in 1993[1], and resulted in a mathematical theory of differently exposed pictures of the same subject matter that was published in 1995 by Steve Mann and Rosiland Picard[2]. In 1997 this technique of combining several differently exposed images to produce a single HDR image was presented to the computer graphics community by Paul Debevec.
This method was developed to produce a high dynamic range image from a set of photographs taken with a range of exposures. With the rising popularity of digital cameras and easy-to-use desktop software, the term HDR is now popularly used[3] to refer to this process. This composite technique is different from (and may be of lesser or greater quality than) the production of an image from a single exposure of a sensor that has a native high dynamic range. Tone mapping is also used to display HDR images on devices with a low native dynamic range, such as a computer screen.
How to create HDR image from single RAW photo.1. From single RAW file, save file in different exposure ie. -2,-1,0,+1,+2 in .jpg/.jpeg file.
2. Open Photomatix and click Generate HDR. Browse all the file with different exposure which have been saved and select all files.
3. See that all the file has been set based on preset. Resetting the exposure if seen there are same exposure.
4. Click OK.
5. Click Tone Mapping.
6. Adjust in Tone Mapping and then save as .tiff
7. Open .tiff file using Photoshop CS
8. Adjust level / saturation / sharpness
9. Save as .jpg/.jpeg and you're done.
Give it a try. If you have trouble, please post some comment and I'll try my best to help out.

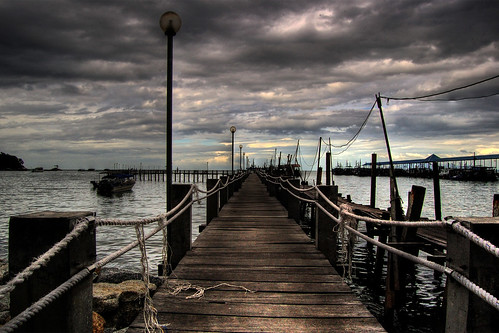 After tone mapped with PhotomatixPro and few adjustment in Photoshop CS2.
Other HDR samples.
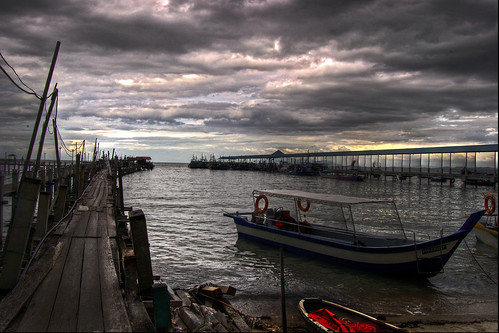 Location : Teluk Bahang, Penang, Malaysia
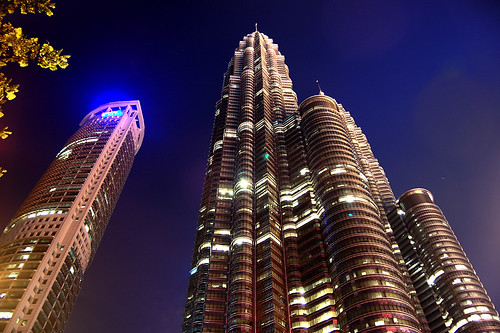 Petronas Twin Tower & Maxis Tower
Kuala Lumpur, Malaysia
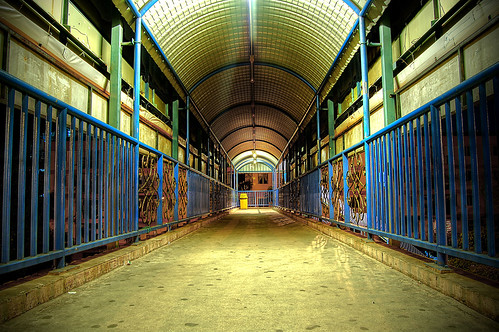 Pedestrian Flyover in front of Sunway Piramid
Sunway City, Selangor.


No comments:
Post a Comment